 Who this is for: All users (for their own account); company administrators (to enforce it company-wide).
Turn on MFA for your own account
-
Click your avatar (top right) and choose View my profile.
-
Open the Security tab.
-
In the Multi-Factor Authentication card, choose a method.
Authenticator app (recommended)
-
Click Set up authenticator app
-
Scan the QR code with an authenticator app (Google Authenticator, Microsoft Authenticator, 1Password, or similar). If you can't scan it, type in the manual key shown.
-
Enter one code from the app into First authentication code, wait for the app to refresh, then enter the next code into Next authentication code.
-
Click Confirm and enable MFA.
-
Save the recovery codes you're shown somewhere secure — each one can be used once if you ever lose access to your app.
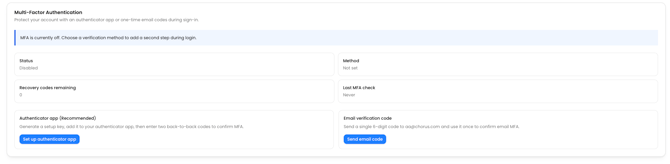
Email verification code
-
Click Send email code.
-
Enter the 6-digit code sent to your email address into Email verification code.
-
Click Confirm and enable email MFA.
Once enabled, the card shows your status as Enabled and which method is in use.